
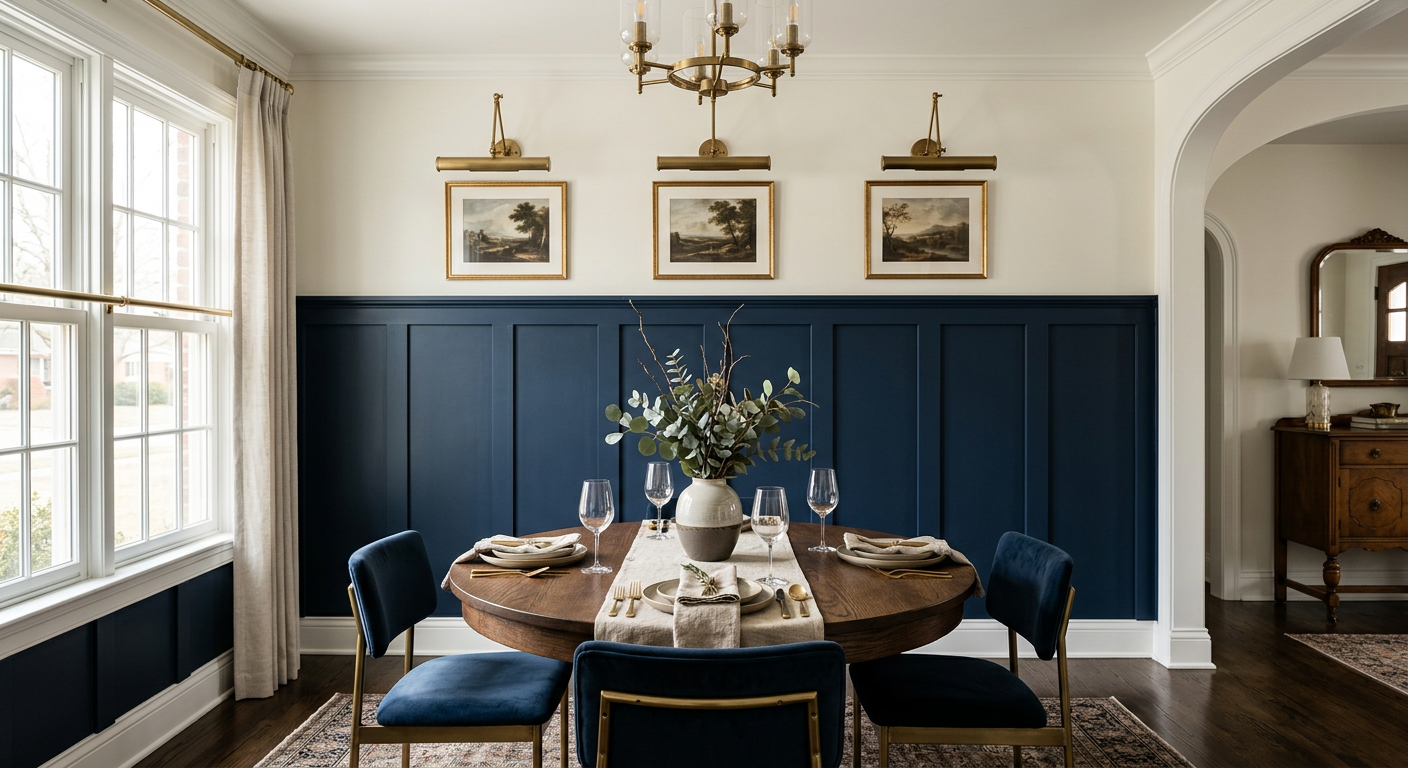
There's a reason every interior designer in Atlanta puts wainscoting in their top five value-adds for a home, and it's not because they're trying to pad an invoice. It's because wainscoting is one of those rare upgrades where the visual impact is completely disproportionate to the cost. A flat drywall hallway looks like a rental. That same hallway with board and batten wainscoting looks like a $900,000 home in Brookhaven. The materials cost about $400. The perceived value bump at resale? Consistently $3,000-5,000, according to every staging consultant I've worked with over the past two decades.
Board and batten is the style I recommend for 90% of homeowners because it's clean, modern enough for contemporary homes, traditional enough for older ones, and nearly impossible to mess up. You're gluing and nailing vertical strips of MDF to a wall at even intervals, adding a cap rail at the top, and painting everything one color. That's it. If you can use a level, a nail gun, and a tape measure, you can do this in a weekend.
Choosing Your Wall and Height
The two rooms that benefit most from wainscoting are the dining room and the hallway. Dining rooms because they get photographed more than any other room during a listing (after the kitchen), and hallways because they're inherently boring — long, flat, featureless. Wainscoting gives them a reason to exist.
Height matters more than you think. The classic rule is one-third of the wall height. For standard 8-foot ceilings, that's 32 inches. For 9-foot ceilings — which are standard in most metro Atlanta homes built after 2000 — go to 36 inches. I've seen people run board and batten to 48 inches and it works in rooms with 10-foot ceilings, but in a standard room it starts to feel like you're inside a shipping crate. One-third. Trust the math.

Materials and Cost Breakdown
For a standard 14-foot dining room wall, here's what you're buying:
- MDF boards, 1x4, 8-foot lengths (8-10): $4-5 each = ~$45 — these are your battens (the vertical strips).
- MDF board, 1x6, 8-foot lengths (2): $7 each = $14 — this is your top cap rail.
- MDF board, 1x2, 8-foot lengths (2): $3 each = $6 — optional detail strip under the cap rail for a more layered look.
- Liquid Nails Heavy Duty (2 tubes): $10
- Brad nails (18-gauge, 1.5-inch): $8
- Paintable caulk (2 tubes): $10
- Wood filler: $6
- Primer (1 quart): $18
- Paint (1 gallon): $65-80 — yes, I'm about to tell you which one.
- Sandpaper (220-grit): $5
Total materials: $185-210 for one wall. For a full room (four walls), you're at $400-500. That's the price of a mediocre dinner for four in Buckhead — and this lasts forever.
The Paint
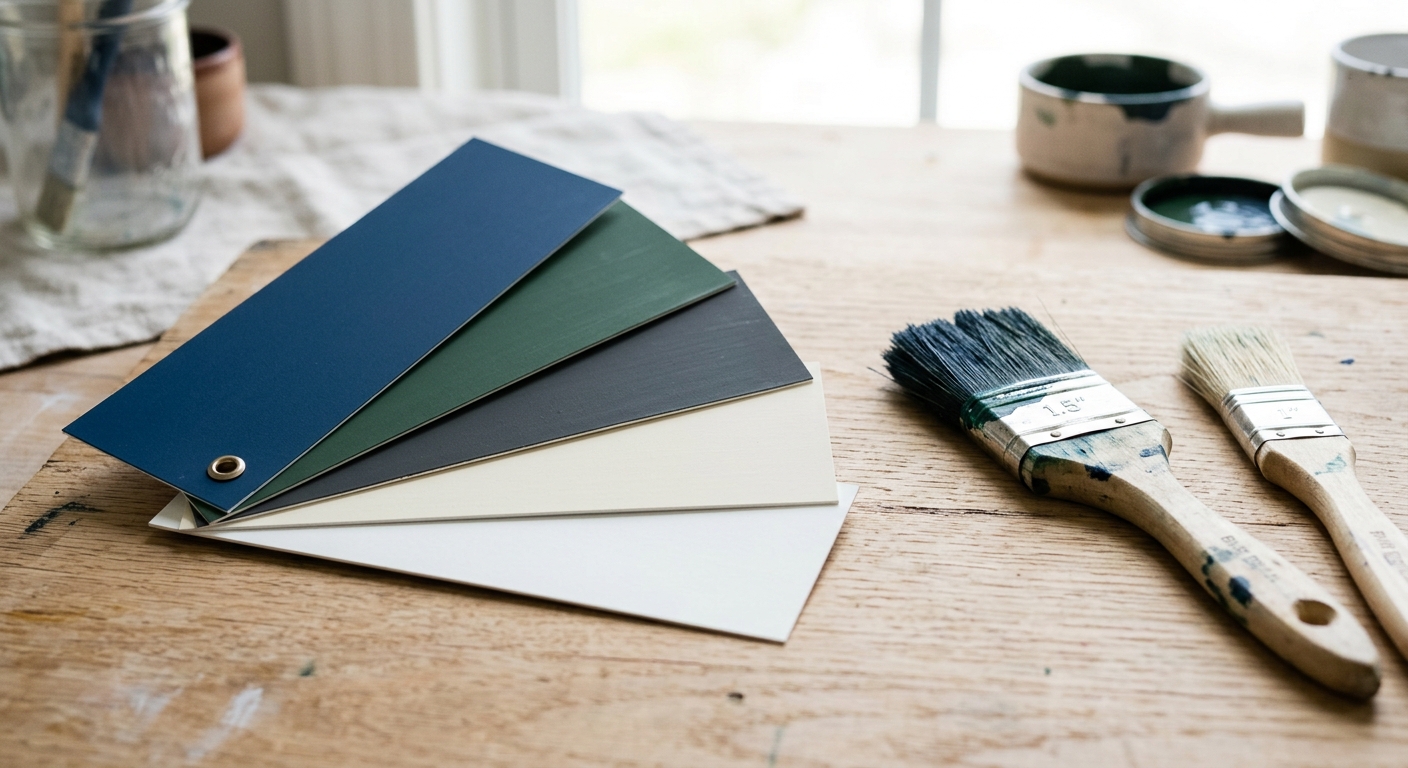
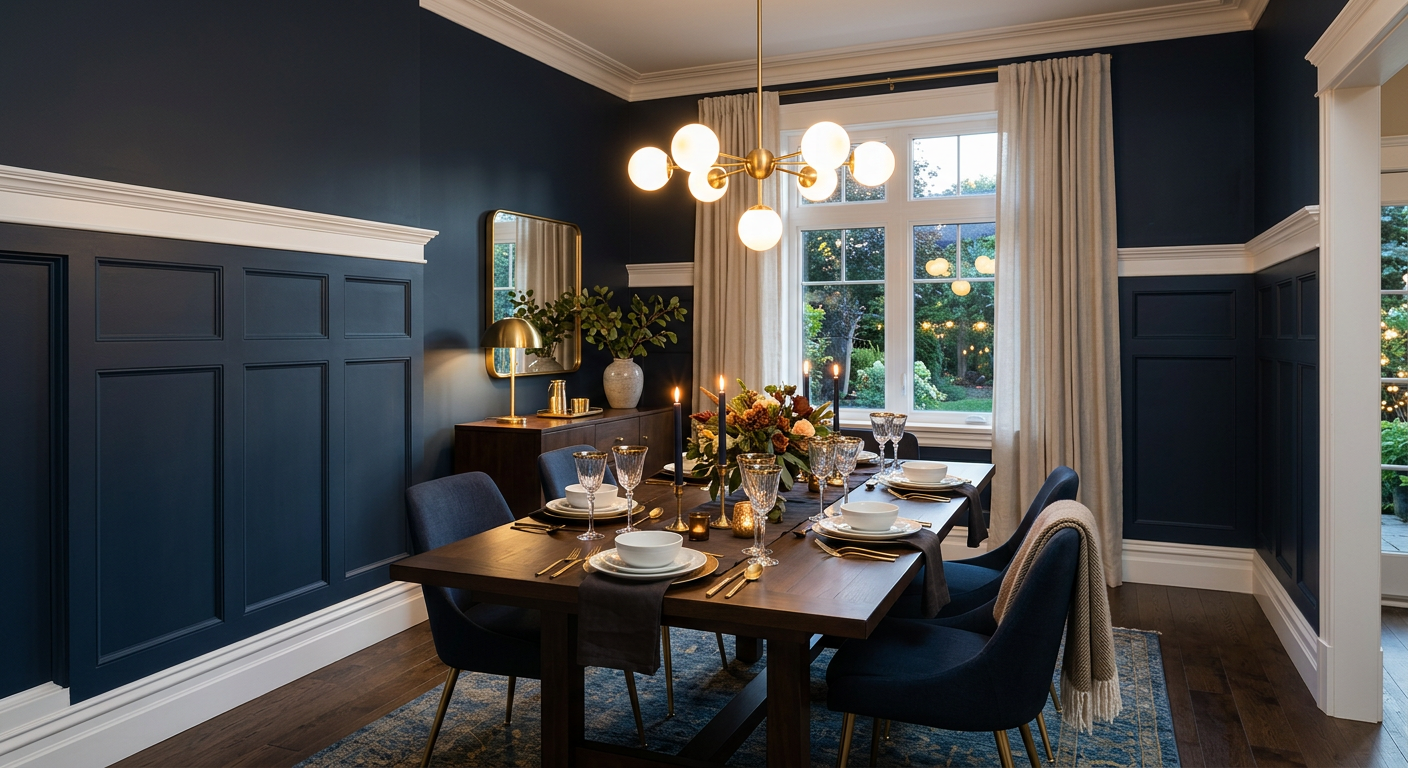
Benjamin Moore Advance is the only paint I use for trim and wainscoting. It self-levels like an alkyd, cures to a hard shell, and sprays or rolls beautifully. For color: Hale Navy (HC-154) is the Atlanta dining room classic — deep, dramatic, photographs like a dream. Simply White (OC-117) is the safe play and works in hallways where you want brightness without sterility. Salamander (2050-10) is the dark horse — a rich, moody green that's been showing up in every high-end staging in Buckhead and Decatur this spring. Pick one. Commit. Paint the battens, the cap rail, and the wall behind them all the same color. One color. That's what makes it look built-in rather than stuck-on.

Benjamin Moore
Advance Interior Paint (Gallon)
$80Available at Benjamin Moore dealer, Buckhead
Shop Now
MDF
1x4 MDF Board 8ft Length

DEWALT
18-Gauge Brad Nailer Kit

DAP
Stainable Wood Filler

Stanley FatMax
48-Inch Box Beam Level

Installation: Step by Step
Step 1: Mark Your Layout
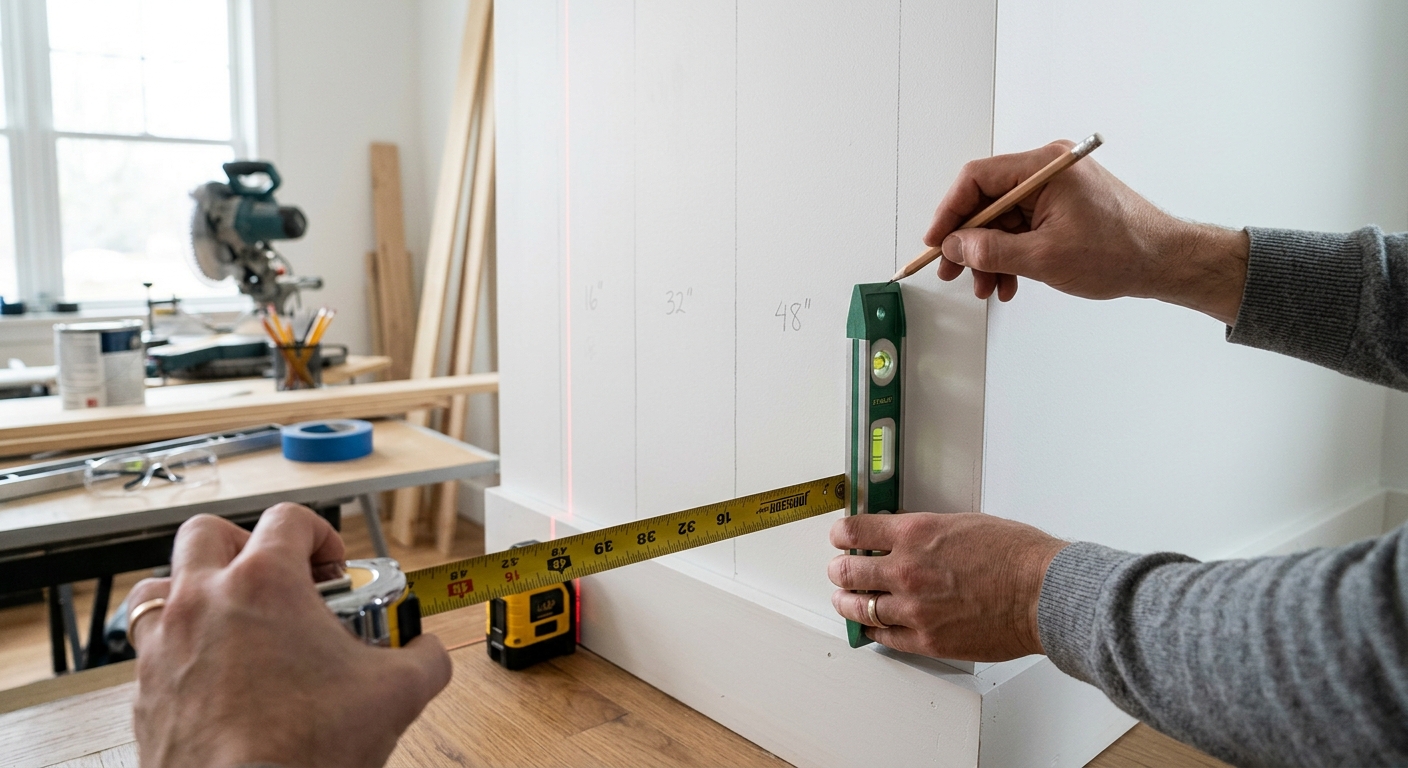
Measure the total wall length and divide by your desired batten spacing. I use 16 inches on center for a standard dining room — it looks balanced without being busy. For a hallway, 12 inches gives a tighter, more intentional pattern. Mark vertical lines on the wall at each batten position using a level and a pencil. This is the only step where precision actually matters, so take your time.
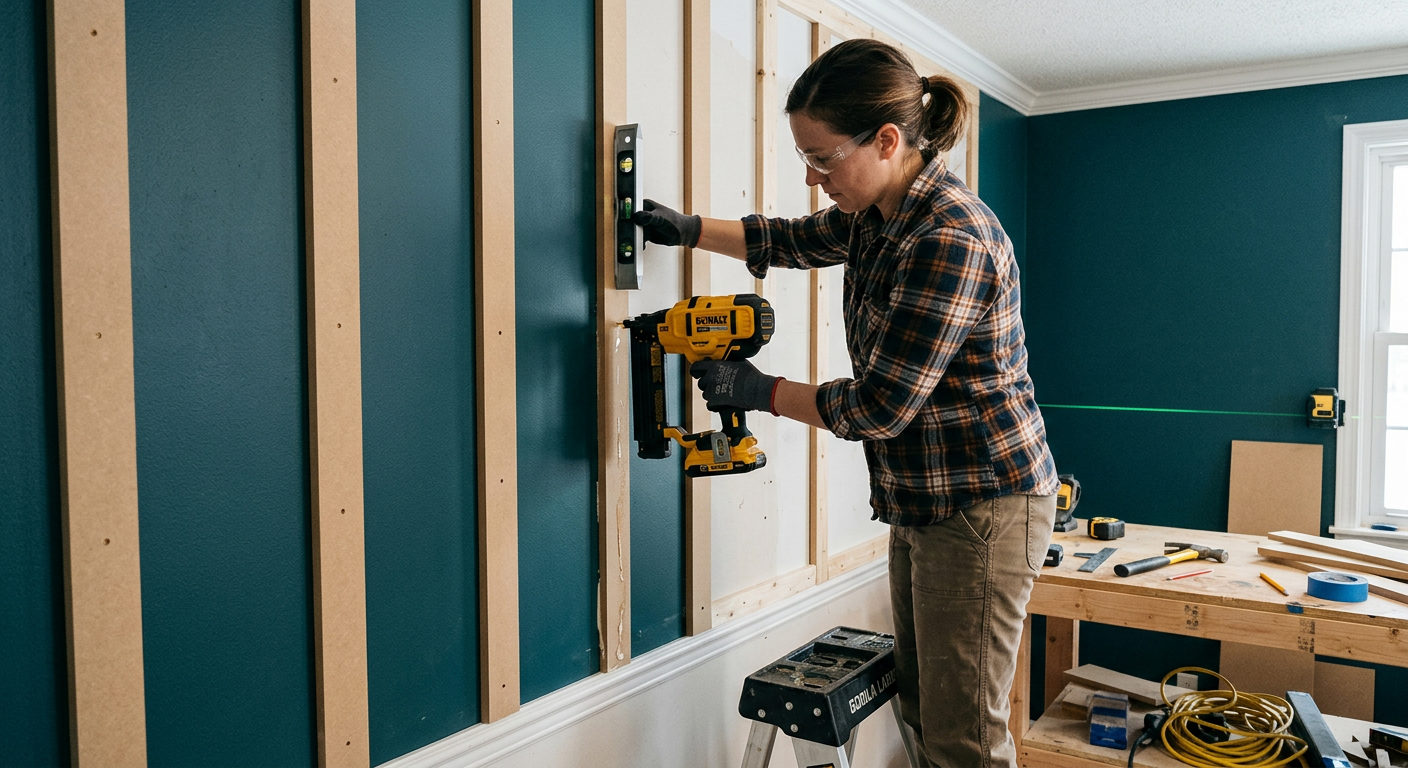
Step 2: Install the Battens
Cut your 1x4 MDF battens to your chosen wainscoting height (32 or 36 inches, remember). Apply a zigzag of Liquid Nails to the back of each batten, press it against the wall on your pencil line, check it with the level, and nail it with two brad nails — one near the top, one near the bottom. The construction adhesive does the structural work; the nails just hold it in place while the glue dries. Move down the wall, batten by batten. This goes faster than you expect — a 14-foot wall takes about 45 minutes.
Step 3: Add the Cap Rail
The cap rail is a horizontal 1x6 that runs along the top of all your battens, creating a clean ledge line. If you're adding the 1x2 detail strip, nail that to the wall first, flush with the top of the battens, then mount the 1x6 cap on top so it overhangs slightly. This creates a small shadow line that makes the whole thing look like custom millwork. Miter your corners at 45 degrees if the wainscoting wraps around a corner. Cope them if you're feeling confident — but a tight miter with caulk looks just as clean.
Step 4: Fill, Caulk, and Sand
This is the step that separates "I built wainscoting" from "that looks professionally installed." Fill every nail hole with wood filler, let it dry, sand it flush. Caulk every seam where a batten meets the wall, where the cap rail meets the wall, and where battens meet the cap rail. Run a wet finger along the caulk line for a smooth bead. Sand any rough MDF edges with 220-grit. This step takes longer than the installation itself. Do it anyway. The paint will expose every shortcut you take.
Step 5: Prime and Paint
Prime the bare MDF with a shellac-based primer (BIN by Zinsser is the standard — the MDF will soak up latex primer and swell at the edges). One coat, let it dry for two hours. Then two coats of your Benjamin Moore Advance, sanding lightly with 220 between coats. If you have a spray setup, use it — the finish will be flawless. If you're rolling, use a 4-inch foam mini roller and keep your coats thin. Advance levels out beautifully, but only if you don't glob it on.

Why This Works
Flat drywall absorbs light. Wainscoting creates shadow lines — those thin gaps between each batten and the wall, the overhang of the cap rail, the depth change from the flat upper wall to the raised lower panel. Shadow lines are what make a room feel designed. It's the same principle behind coffered ceilings, picture frame molding, and the trim work in any home that stops you at the front door. Your brain reads depth as quality. Wainscoting manufactures depth for less than the cost of a decent pair of shoes.
And the resale math isn't theoretical. I've sold homes in Peachtree City, Newnan, and Fayette County where the listing photos of wainscoted dining rooms generated more engagement than the kitchen. Buyers see it and think "this homeowner cared." That perception — that someone paid attention to the details — carries through the entire showing. A $400 project that rewires how a buyer feels about your house is the best ROI in home improvement. It's not even close.
If you're doing one project this spring before you list — or before you host, or before you stop staring at that blank hallway wall — this is the one. $400. One weekend. A room that finally looks like it belongs in the house you're paying for.


